


Repairing the walls of your house before painting them is a simple task that you can do yourself. We tell you how to do it.
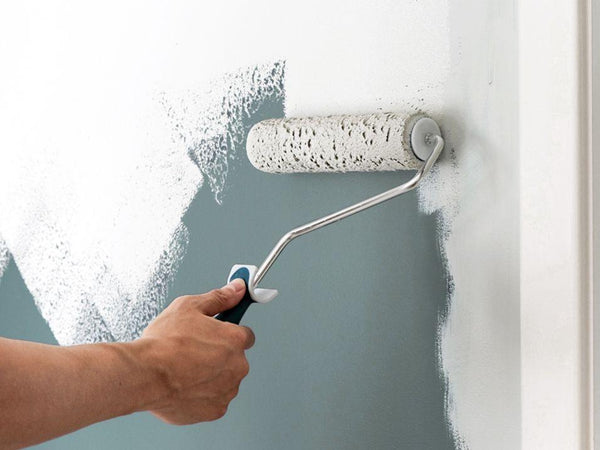
To change the air in your home, nothing is more straightforward and more effective than giving the walls a new coat of paint. But, for the work to be impeccable, before renewing the colour you have to make sure that the walls are in perfect condition. We tell you how to prepare a wall to paint and learn to handle sandpaper, spatulas and putty-like a professional.
If you never dared to arrange home, but you really want to try, it is time to put on a pair of gloves, old clothes and get to work. The result will not only be a pleasant space to be in but the satisfaction of having improved your home with your own hands.

Getting your walls to be completely smooth and without imperfections is a procedure that does not have any complications. You just have to pay attention to the details and follow these instructions step by step:
First stage: Cleaning
Check all the surfaces you are going to paint for cracks, globes that have formed from old paint, or damage to the plaster. Mark them for having them identified when starting work
Protect the floor by covering it with plastic or corrugated cardboard. Make sure there is no uncovered space. In this way, you will avoid unnecessary stains and then it will be easier to clean it.
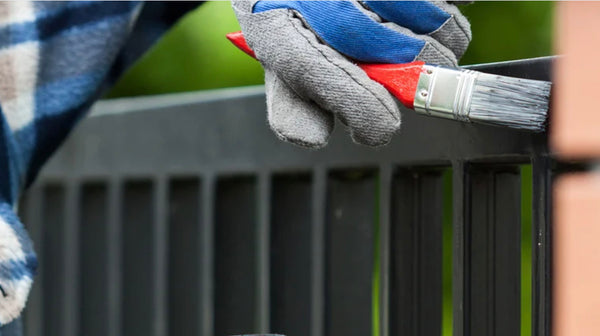
Before starting, and to preserve your safety, you must put on a pair of gloves of gender or other type and a chinstrap.
It's time to clean the walls. First, you have to do a very superficial cleaning. To do this, use a brush or a cloth that allows you to remove spider webs and accumulated dust. This way, your brush will stay clean while you apply the paint.
Now is the time for a deeper cleaning, which involves removing any mould that may have built up. Spray the surface of the wall with an antifungal or mould remover solution. You can buy it in hardware stores or online stores. Take the precaution of correctly following the instructions on the container.
The stage has arrived where you will have to remove the old paint and wallpaper. Grab a wall sander and start running it until no traces of paint remain.
If you have to remove wallpaper, it is best to use a wallpaper remover, which contains a "solvent" that softens and locks the adhesive. Without this, the adhesive residue can discolour the paint later.
In case cracks appear when cleaning the wall, you have to take the trouble to open those cracks even more. To do this, it is best to use the tip of a spatula in one direction and then the other, spreading them as far as possible, until you find that the plaster is firm again. In this way, you will ensure that you have a well-consolidated base to put on wall putty later and leave it very smooth.

Second stage: Repair
Once you have gotten rid of the deteriorated plaster or plaster, follow the instance of applying the wall sealant. Thus we will increase the holding power of the filler or putty that you will place later.
Next, you can start applying the filler or putty (or wall plaster if you prefer) on the different points of imperfections on the wall, seeking to achieve the first coat with a fine and resistant finish. Try to fill in the holes and cracks well and then smooth it out with the spatula. This first coat should be allowed to dry for a period of approximately 24 hours.
If you are going to use filler or putty, due to the compaction of these products in the cracks, it is very likely that, for a truly smooth finish, a second coat will be necessary. Carry it out using the same steps mentioned above.
It only remains to sand gently and carefully the entire surface of the treated wall.
To conclude, you can use wall fixer. This product is used to ensure a smooth surface and to ensure that the subsequent coat of paint is well absorbed.
How to sand a wall
To make the sanding task easy for you, you can do it using wooden blocks wrapped in the wall sandpaper. Another option is to carry out the process with electric sanders.
If more than one coat of paint has already been applied to the wall that you are going to recycle or other products have been used to decorate (such as lacquers, laminates, etc.), you must use paint removers. This remover is placed on the surface, left to act for the time indicated in the instructions for use, and then it must be removed with a spatula.
When sanding, a lot of dust is generated and, normally, it takes a few hours to clean it. Therefore, a good option for cleaning is to use a handheld vacuum cleaner.
Everything is ready to paint. You can choose the most varied Interior Paint Colours ⚡here https://www.paintoutlet.co.uk/search?q=interior&type=product&product_cat=all ⚡
and encourage yourself to take the next step. You will save a few good pesos and enjoy an excellent hobby.